WPO365 | MAIL

Description

The premium WPO365 | MAIL adds a number of important and / or handy features to the basic set of email features offered by both the WPO365 | LOGIN and WPO365 | MS GRAPH MAILER plugins.

LARGE ATTACHMENTS
  • Add support to send WordPress emails with attachments larger than 3 MB using Microsoft Graph.
SEND AS / SEND ON BEHALF OF
  • Send email as / on behalf of another user or distribution list.
SHARED MAILBOX
  • Send email from Microsoft 365 Shared Mailbox.
STAGING MODE
  • Mail Staging Mode is useful for debugging and staging environments. WordPress emails will be logged and saved in the database instead of being sent.
WP-CONFIG FOR AAD SECRETS
  • Further improve overall security by choosing to store Azure Active Directory secrets in your WordPress WP-Config.php (on disk) and have those secrets removed from the database.
MAIL AUDIT / RESEND
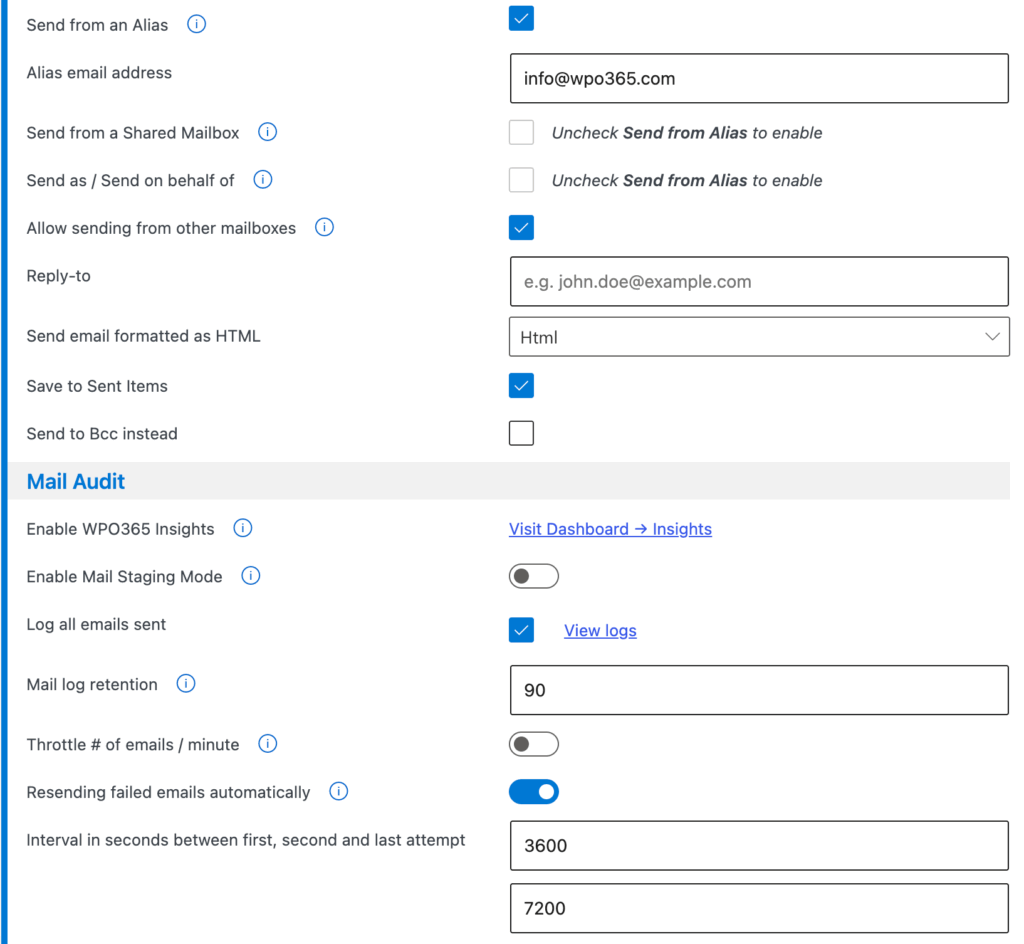
  • Log every email sent from your WordPress website, review errors and (automatically) try to send unsuccessfully sent mails again.
DYNAMIC SEND-FROM
  • Allow forms to override “From” address e.g allow Contact Form 7 to dynamically configure the account used to send the email from (requires application-level Mail.Send permissions).
MAIL THROTTLE
  • Throttle the number of emails sent from your website per minute.
SEND AS BCC
  • Send emails as BCC instead and prevent reply-to-all mail pollution.
REPLY-TO
  • Configure a default reply-to mail address if this should differ from the account’s mail address that is used to send WordPress transactional emails from.

Prerequisites

Either the WPO365 | LOGIN or the WPO365 | MICROSOFT GRAPH MAILER plugin must be installed and activated.

Installation

To install the plugin, simply manually download the purchased item and then upload it to your WordPress site. Visit Plugins > Add New and click Upload Plugin button at the top of the page. Here you need to click on the Choose file button and select the plugin file you downloaded earlier to your computer. After you have selected the file, you need to click on the Install now button. WordPress will now upload the plugin file from your computer and install it for you. You will see a success message like this after installation is finished. Click Activate plugin to finish the installation.

Configuration

Please follow the steps detailed in this article to configure the plugin and its feature(s).

License Activation

  • Copy the license key from the email that you received when you purchased the item.
  • Navigate to WP Admin > WPO365 > Licenses and paste the license key in the license field for this plugin.
  • Click Activate License and verify the notification when the activation completes.

Updates

WPO365 plugins are fitted with an update checker and hence, whenever an update in the form of a newer version is available, you should see this in your WP Admin panel and you can click Check for Updates or, in case a newer version is available Update now.

Support

WPO365 support is free for everyone. You may open a support ticket at any time. Support for premium features, however, requires a valid license key for a plugin or pass. License keys are issued at the time of purchase.

End User License Agreement

Click here to read the End User License Agreement.

From $49.00
  • Billed once per year until cancelled

  • Billed once per year until cancelled

  • Billed once per year until cancelled

  • Billed once per year until cancelled

  • Billed once per year until cancelled