
In this article
- Register your WordPress website in your Azure Active Directory to enable Single Sign-on
- Create a secret that the plugin can use to retrieve information from Microsoft Graph
- Receive a user’s upn, email, first and last name
- Obtain a user’s (Azure AD security) group IDs.
Register your WordPress website in your Azure Active Directory
To allow your WordPress website users to sign in with Microsoft, you’ll need to register your website with Microsoft first. To do you, you must create an App registration in (your tenant’s) Azure Active Directory.
Since May 2019 Microsoft has rapidly changed the way you register new applications in Azure AD. As a result, you’ll create an application that is compatible the v2.0 endpoint by default.
If you like to read more about the differences between v1.0 and v2.0 you can read this article by Microsoft.
Register a new application in the Azure Portal as follows:
- Sign in to the Azure Portal
- Choose your Azure AD tenant by clicking on your account in the top right corner of the page.
- In the left hand navigation pane, click on Azure Active Directory.
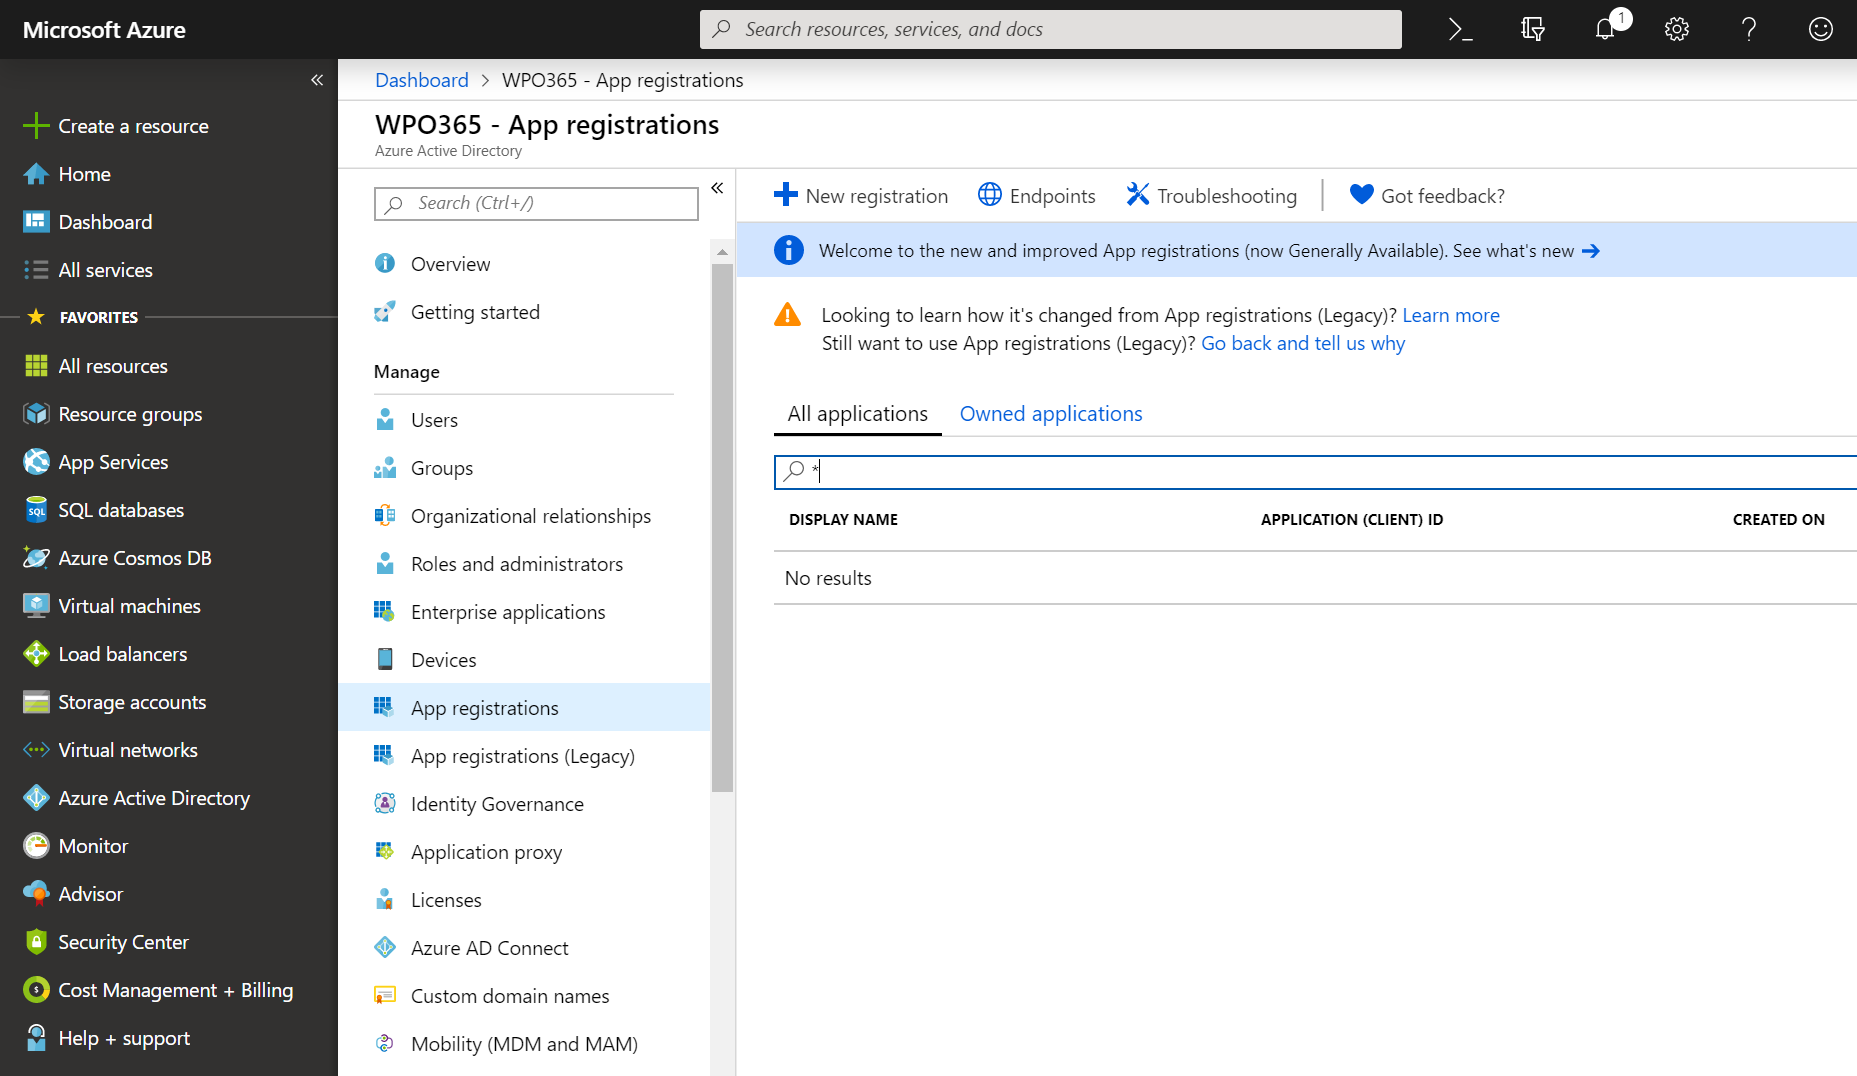
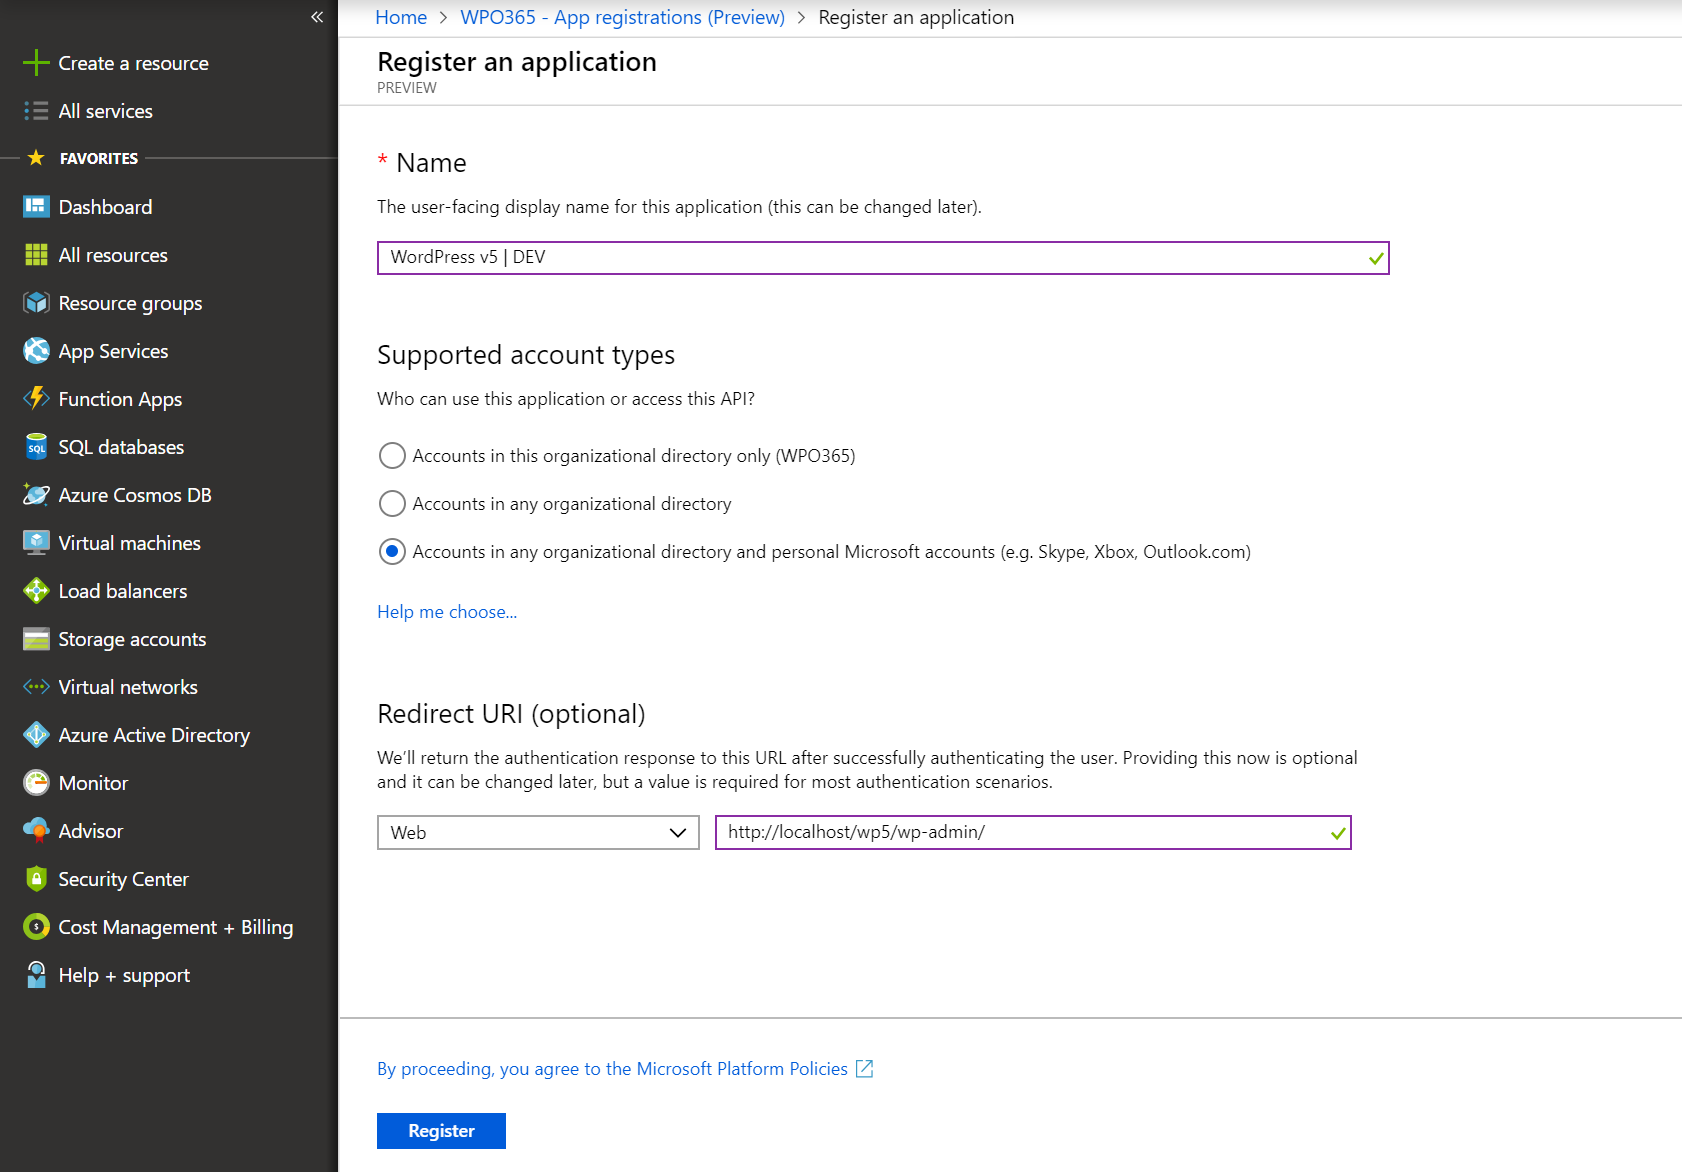
- Click on App registrations and click on + New registration. Don’t worry too much about the Name you enter here. It is just for you to easily recognize the app later.
- Next you need to specify the supported account types. If you just want users from your own tenant to be able to sign into your WordPress website with the help of our plugin, you should select the first option. If you want users from other Microsoft Azure AD tenants to sign in as well (e.g. partners, customers etc.) you should select the second option. The third and last option is very specific for the v2.0 endpoint. When selected, it allows any user that has a Microsoft Account (MSA) to sign into your website (e.g. microsoft.com, outlook.com and hotmail.com).
- Finally you must specify the Redirect URI. This is the URL where Microsoft will redirect users back to after successfully authenticate them. We recommended that you enter here the WordPress Admin URL of your website e.g https://www.your-website.com/wp-admin/ (you can read this paragraph on caching why we recommend this). Also please note that the Redirect URI must have the same scheme (preferrably HTTPs) as your WordPress Site Address (URL) and the WordPress Address (URL) and this also implies that you must serve both your WordPress front end and back end using the same scheme.
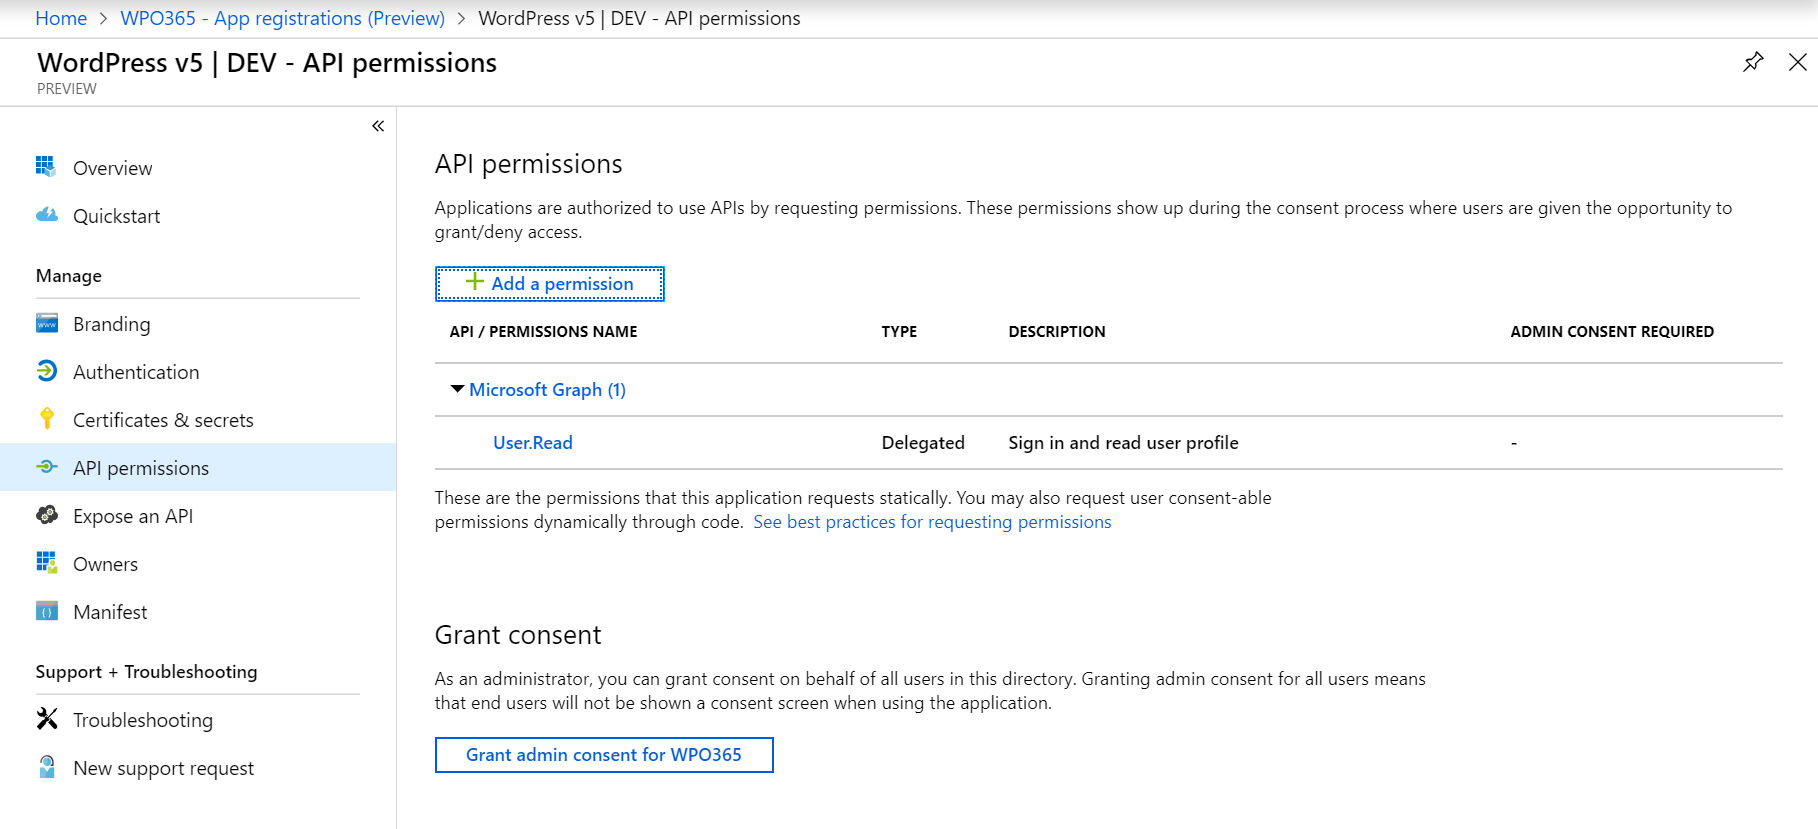
- Next you must configure static permissions for the application (= your WordPress website) you are registering. To do so, click API permissions followed by Add a permission.
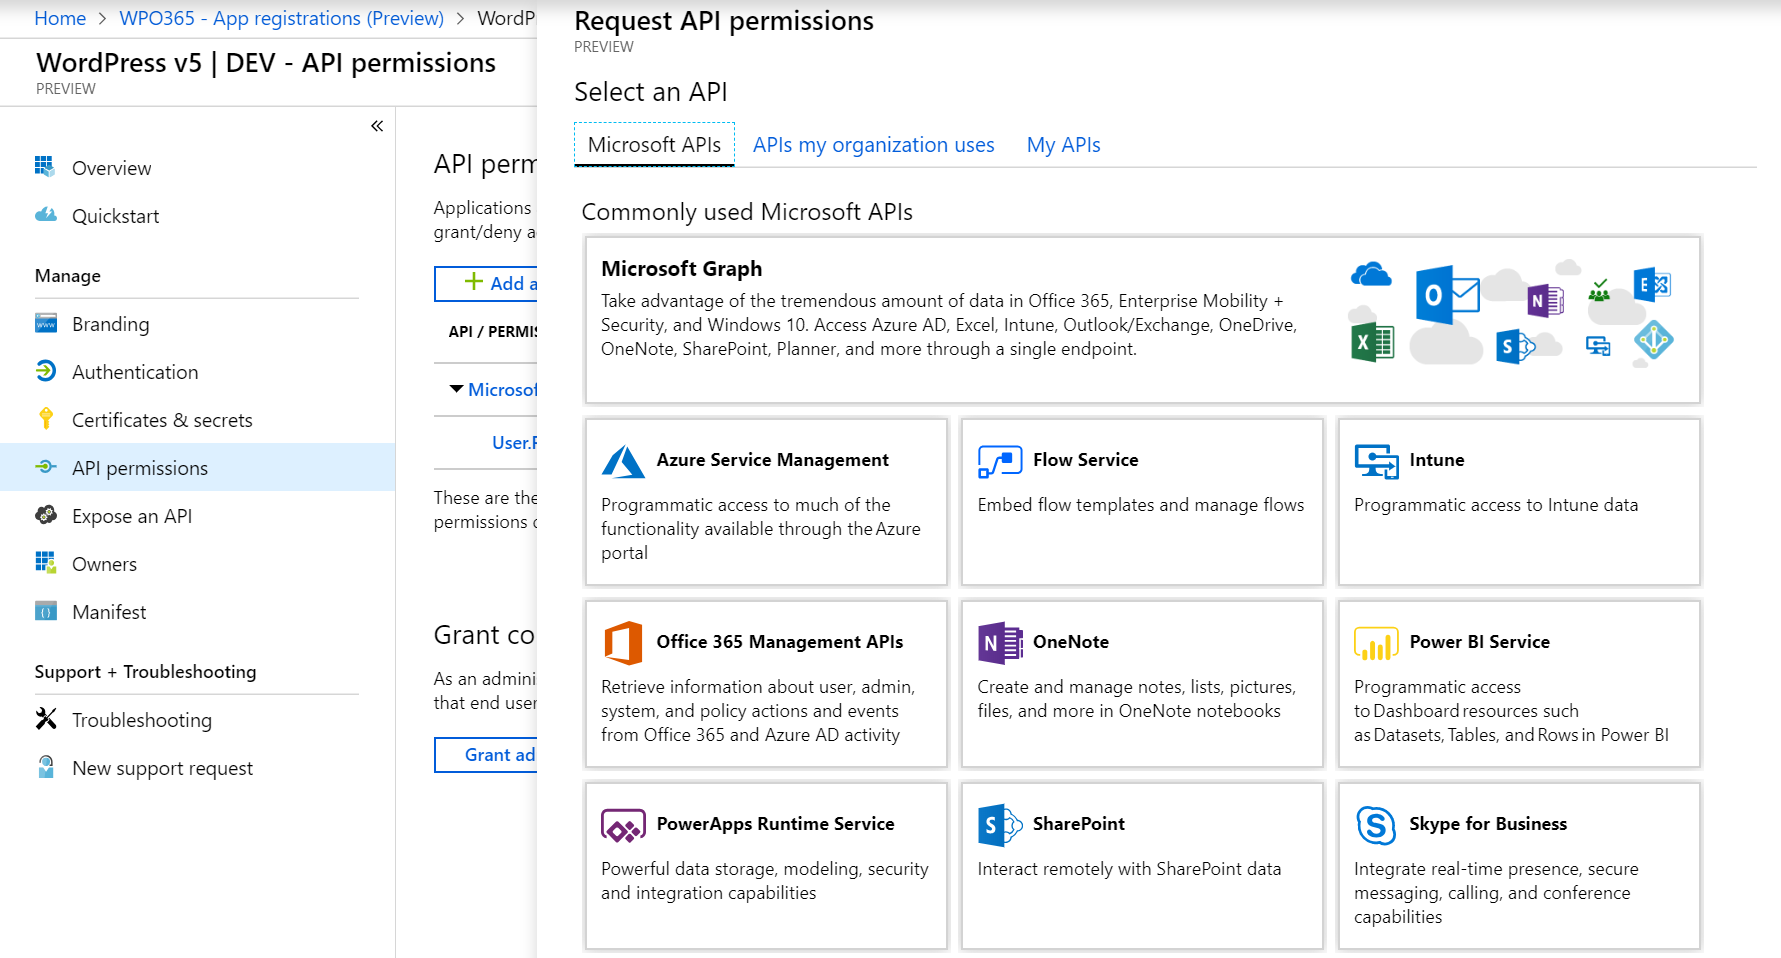
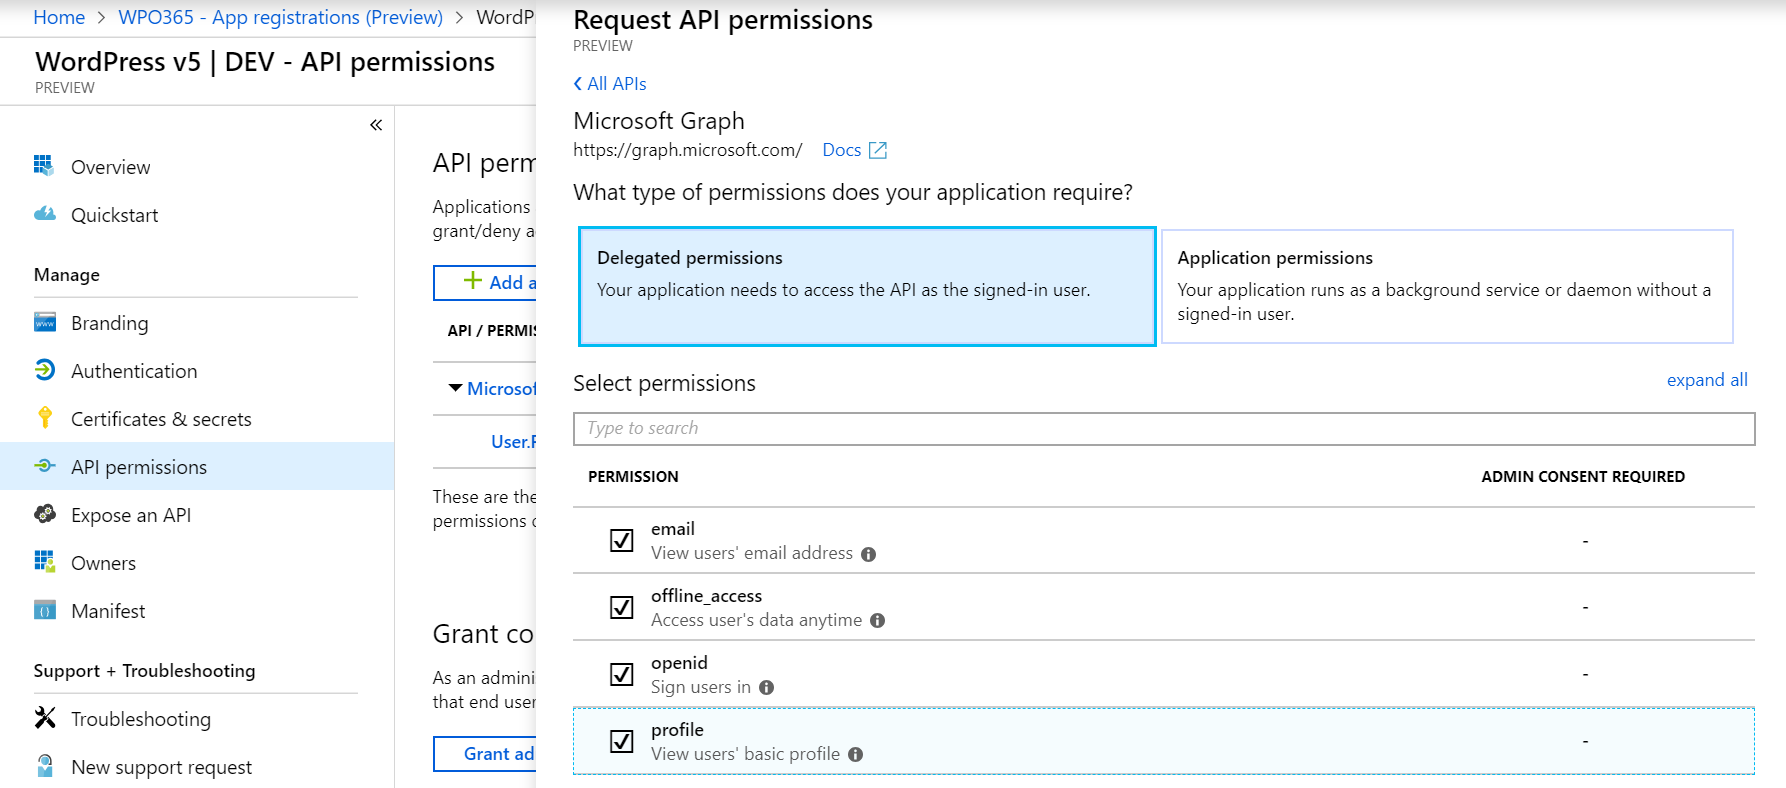
- Click Microsoft Graph in the list of Commonly used Microsoft APIs.
- Select Delegated permissions and then check all four options: email, offline_access (so you can request refresh tokens on behalf of the user), openid and profile.
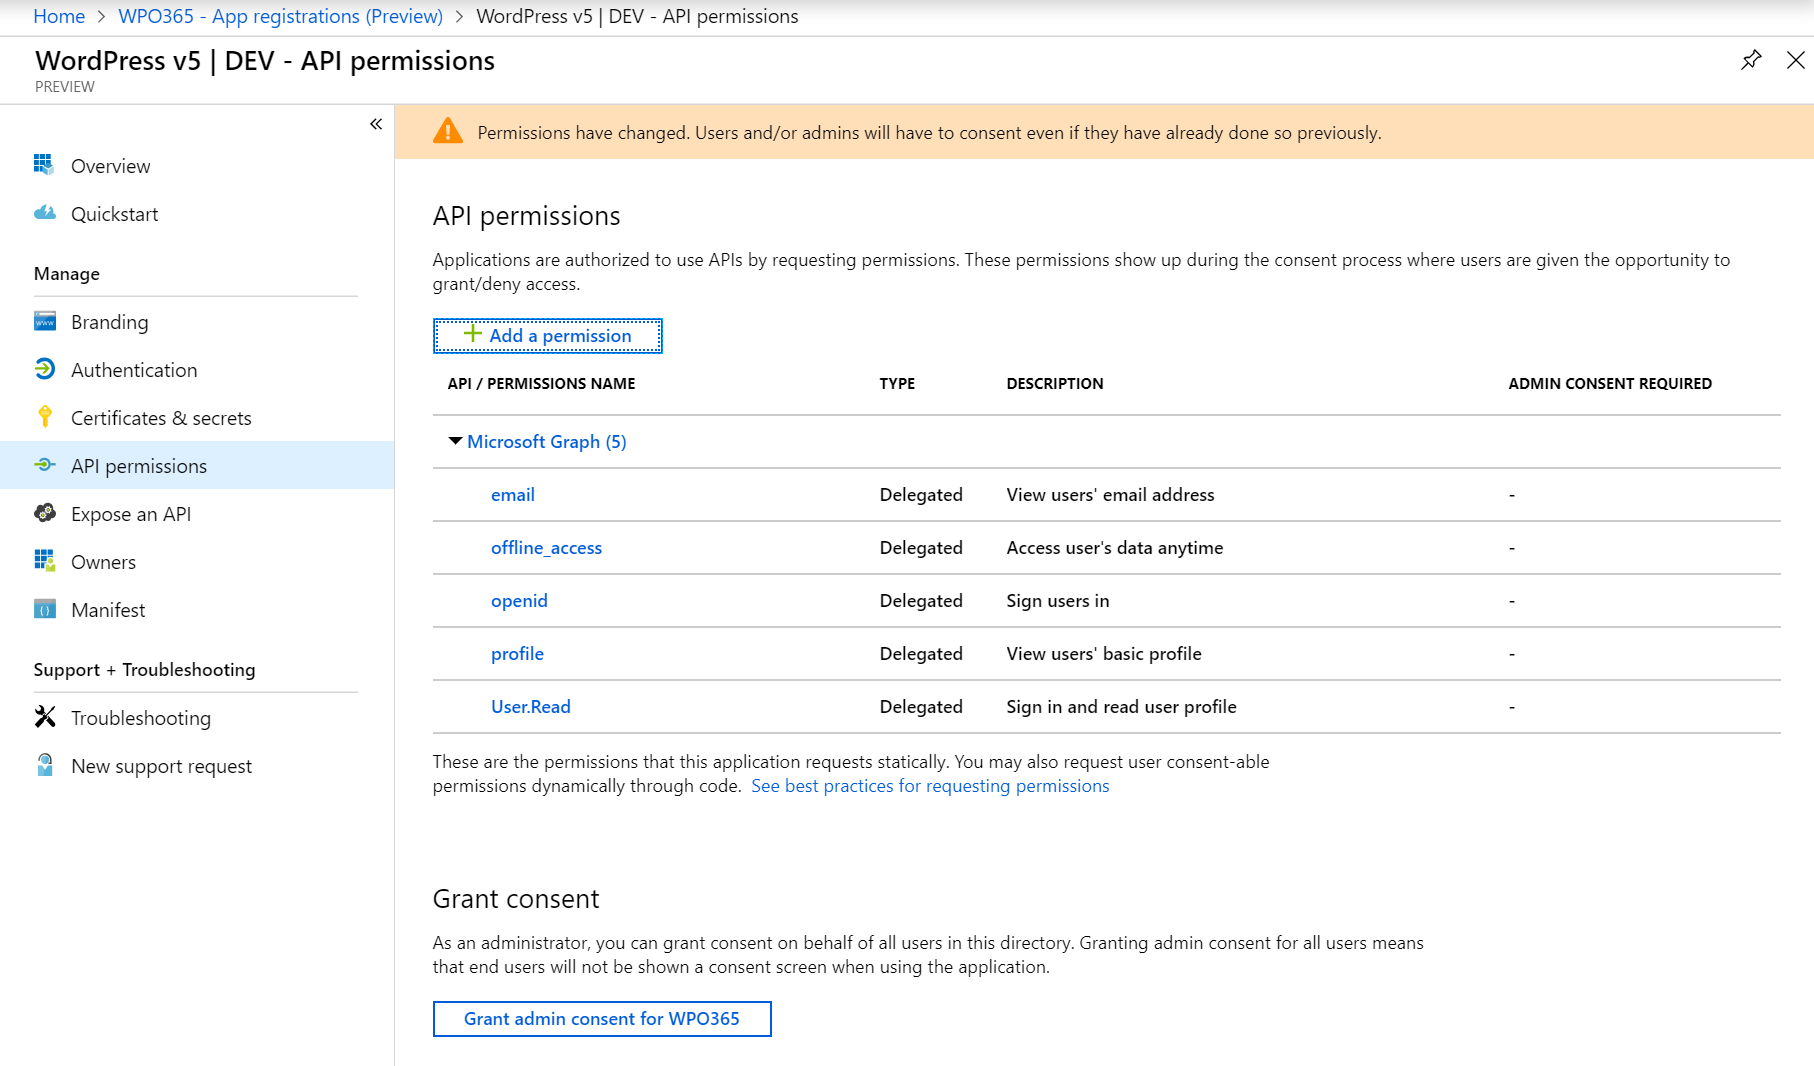
- Save the selected permissions.
- To avoid each user having to consent separately, as administrator, you can do so on behalf of your users by clicking Grant admin consent.
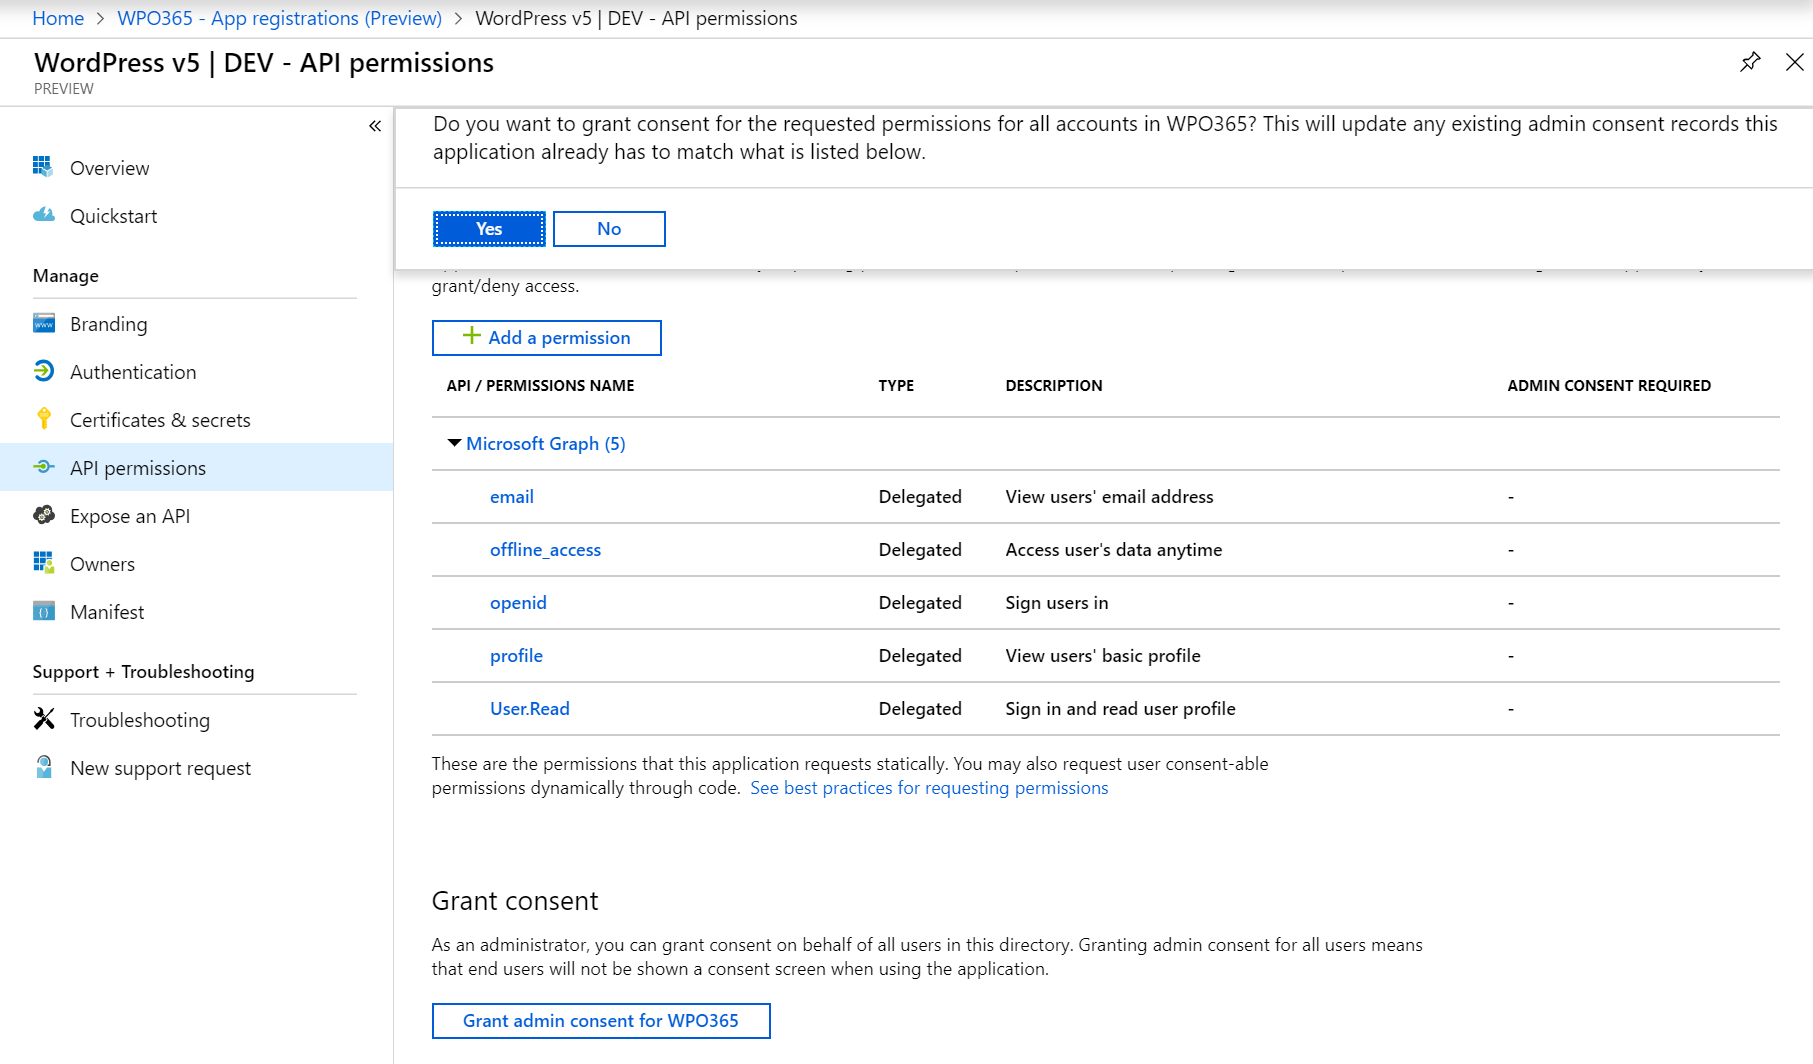
- Answer positively to the question whether you want to grant consent by clicking yes.
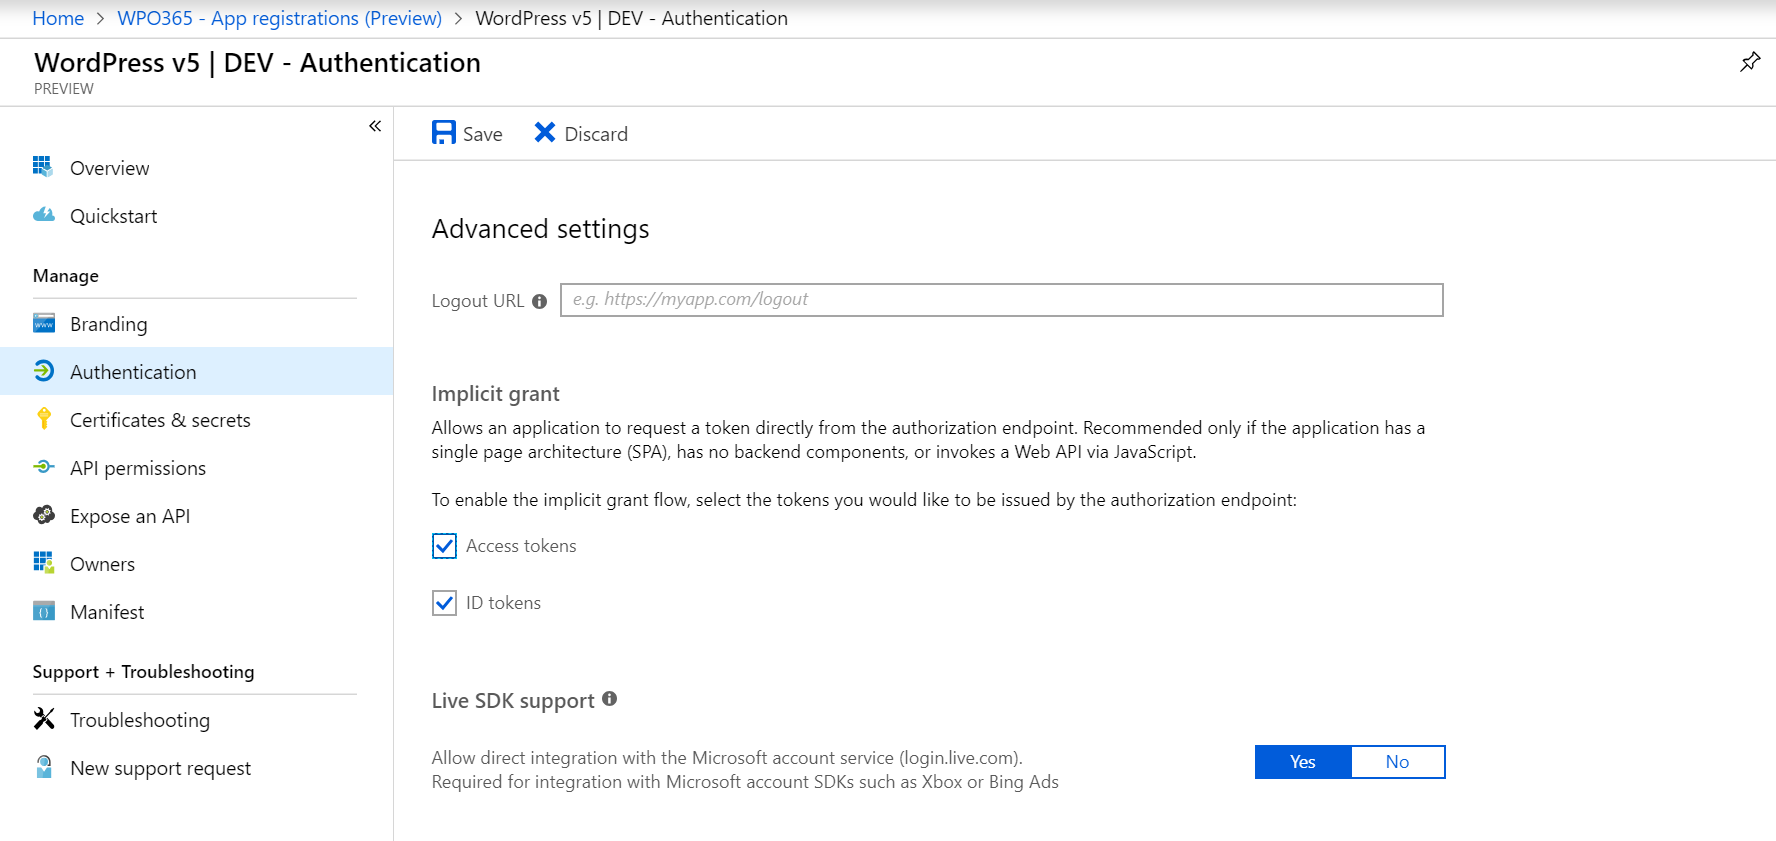
- Next you need to allow the application to request (id and access) tokens directly from this endpoint. To do so click Authentication and check both options: access tokens and ID tokens and Save your configuration.
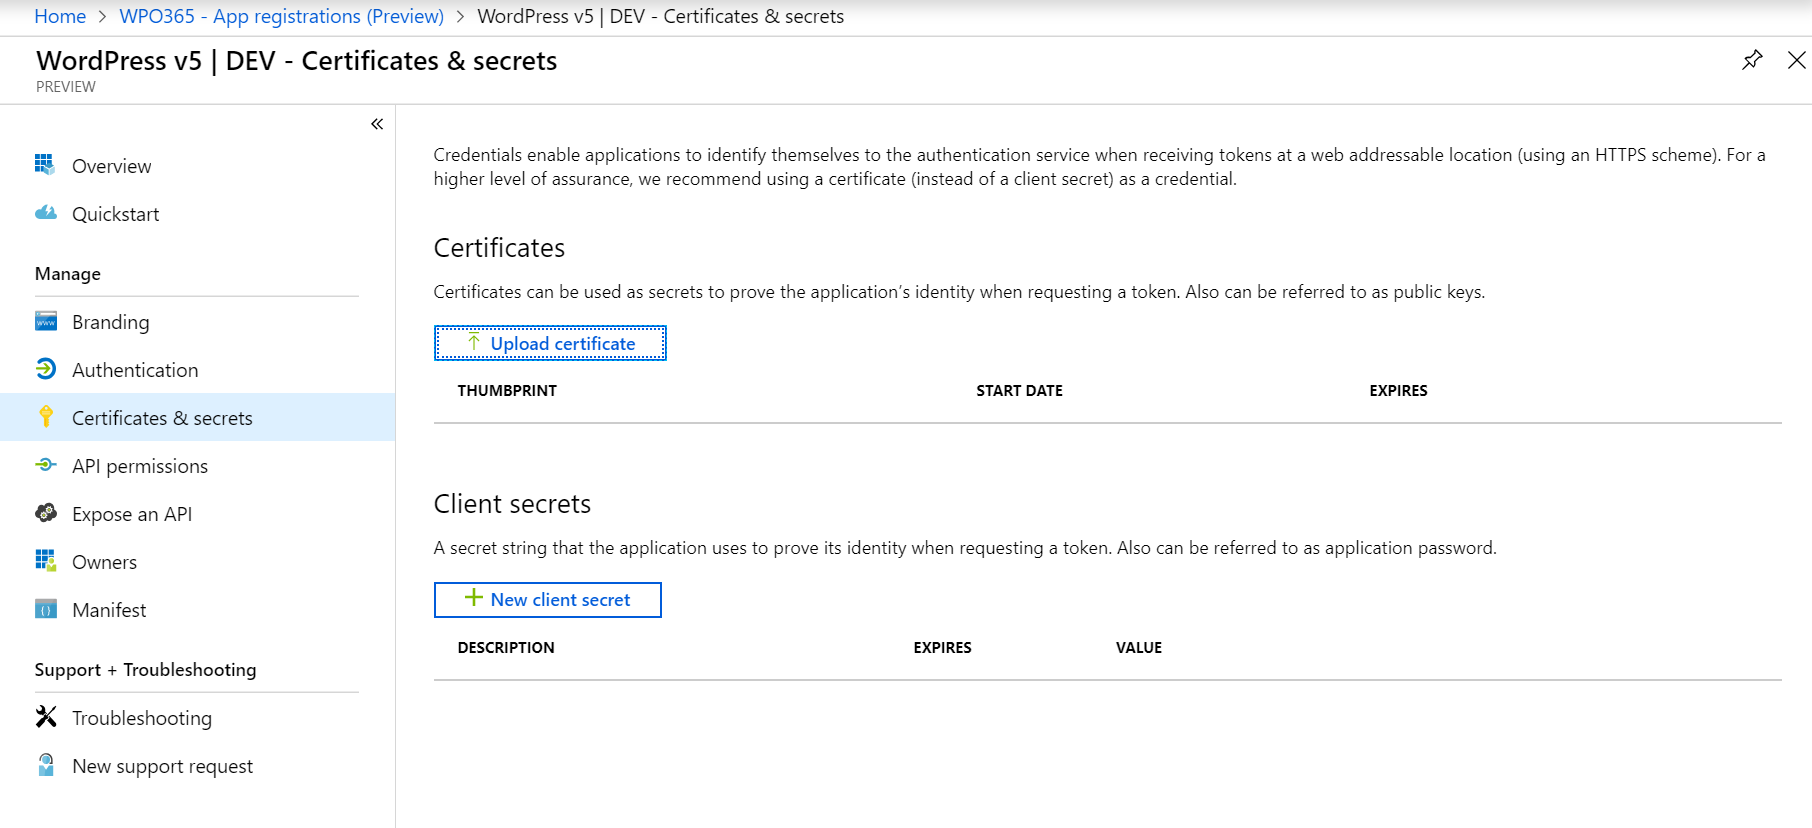
- Last but no least you must create an application secret by navigating to Certificates and secrets and click the + New client secret button.
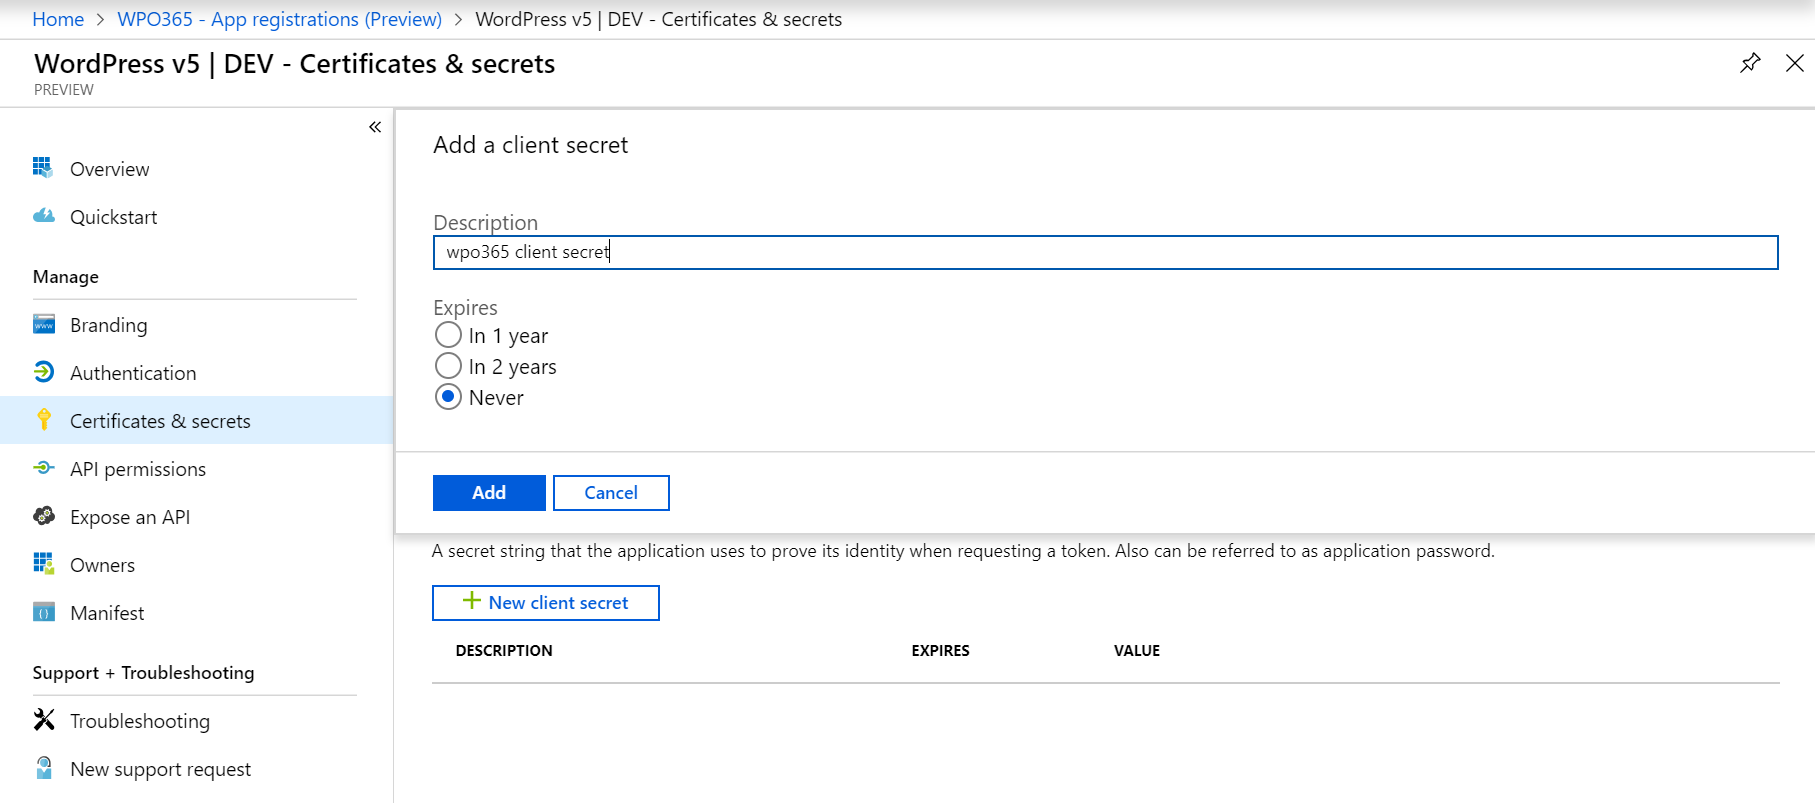
- Add a client secret by entering a Description and select how long the client secret should remain valid e.g. by selecting Never.
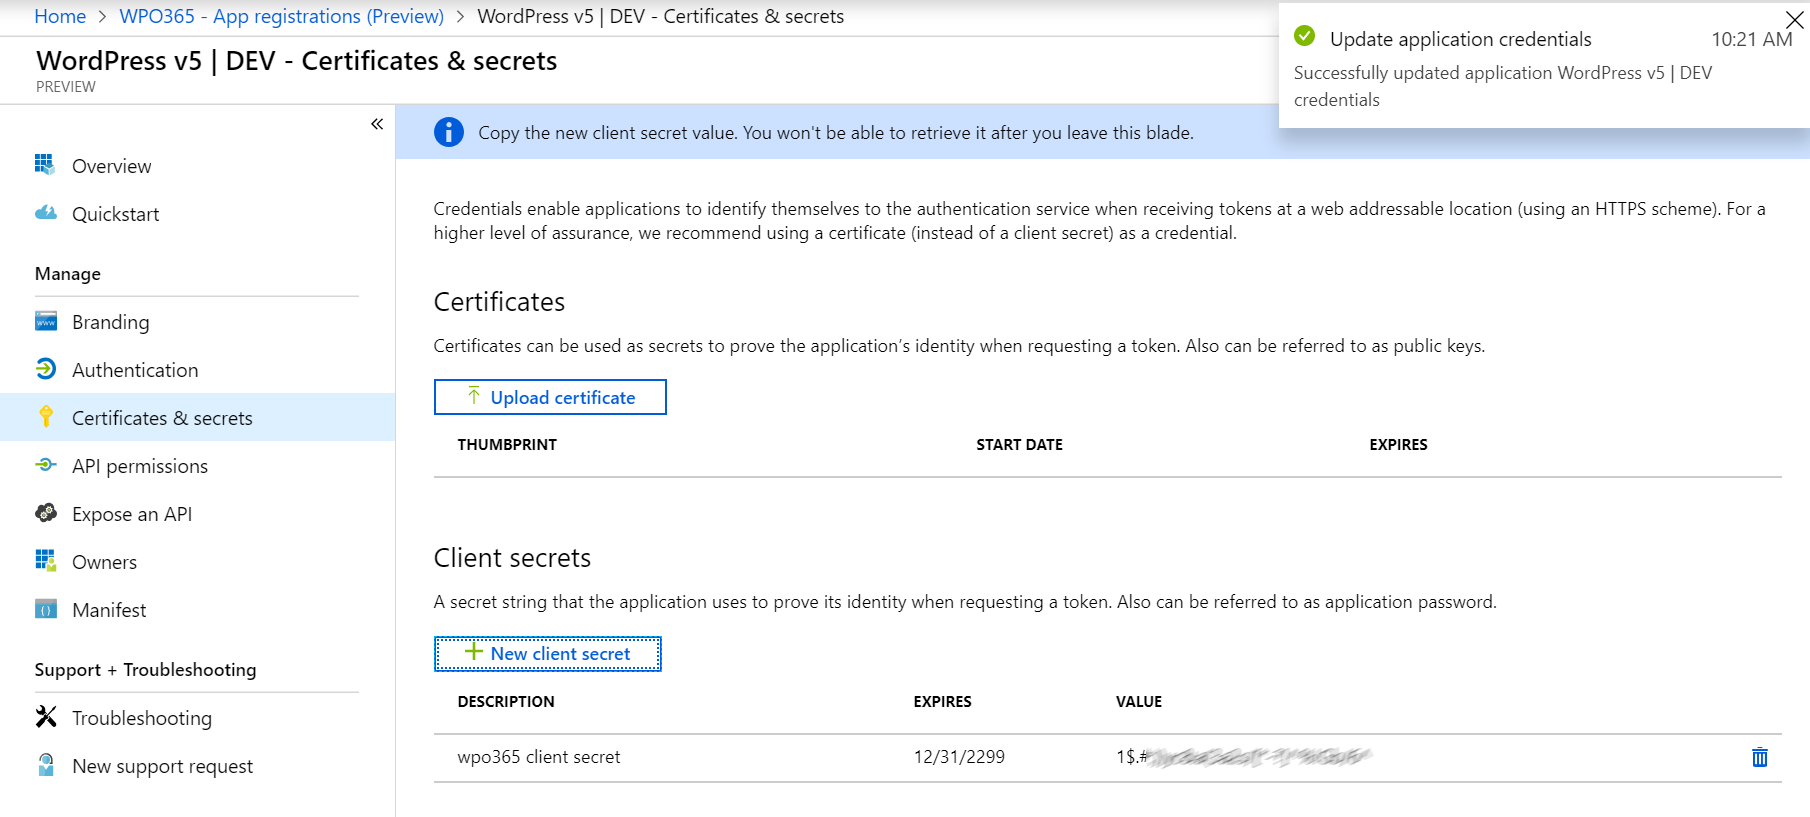
- When you save your new client secret, it will be shown only once to you so make sure you copy it somewhere into a safe location (you need it later to enter it into the WPO365 Options).
Once you have concluded all the steps above, you should have two new values that you need to enter into the WPO Options:
- Application ID
- Application secret
- Directory ID
Receive a user’s upn, email, first and last name
In May 2019 Microsoft has made the new and improved App Registration portal generally available. For some time this new portal has been available under the Azure Active Directory > App registration (preview) menu in the Azure Portal. The old App Registration is still available under Azure Active Directory > App registration (legacy) but most likely it will be discontinued soon.
The change, however, reaches beyond the obvious UI changes and has a direct effect on the content of the ID token that the WordPress + Office 365login plugin receives through the app registered in Azure AD. The ID token does no longer by default contains fields such as user principal name (upn), email, first and last name, most likely to ensure that personal data is handled with more consideration. As a result, you must manually update the app registration’s manifest to ensure that ID tokens include the upn, email, first and last name by adding these optional claims.
- Go to Azure Portal > Azure Active Directory > App registrations
- Find your application registration (you may click on the All applications tab)
- Click Manifest
- Update the Manifest and change the optionalClaims node as shown below
"optionalClaims": {
	"idToken": [{
			"name": "family_name",
			"source": null,
			"essential": false,
			"additionalProperties": []
		}, {
			"name": "given_name",
			"source": null,
			"essential": false,
			"additionalProperties": []
		}, {
			"name": "upn",
			"source": null,
			"essential": false,
			"additionalProperties": []
		}, {
			"name": "email",
			"source": null,
			"essential": false,
			"additionalProperties": []
		}
	],
	"accessToken": [],
	"saml2Token": []
},
Get a user’s (Azure AD security) group IDs
By default the information returned from Microsoft when a user signs in does not contain any information about the Office 365 and / or Azure AD Security / Distribution groups. Change your Azure AD registered app’s manifest as follows to retrieve a list of all the groups a user is a member of as part of the information sent by Microsoft upon signin in.
- Navigate to your Azure Portal
- Click Azure Active Directory
- Select App registrations followed by View all applications
- Select your registered application
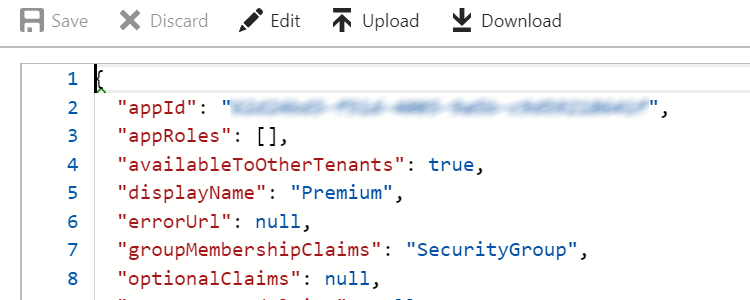
- Click Manifest and edit as follows:
{
...
"groupMembershipClaims": "SecurityGroup",
...
Alternatively, you could also type All to include Office 365 groups. However, this may lead to rather large ID tokens being sent when a user signs into your website and that user being a member of many Office 365 groups.
Pleas note Last but not least, please note that you can reference nested Azure AD groups here. The ID token received from Microsoft will contain all group IDs of all groups the user is a member of and all groupd IDs of all groups those groups are member of etc. In other words, Azure AD will resolve the nested group hierarchy for your convenience.
Miscellaneous
Important If you intend to install the WordPress + SharePoint Online plugin you must create a v1.0 application due to the fact that this plugin will request tokens for a resource rather than for a scope. This will be updated in Juni 2019.