
In this article I’d like to demonstrate how easy it is to add a custom user attribute to a user’s Azure AD B2C profile and synchronize this additional information to WordPress. This would be especially important, if you are using Azure AD B2C as your primary source for identities and maintain it as a secure, single source of “thruth”.
What I mean “a single source of truth” is the following. Users register themselves in Azure AD B2C e.g. using a self-service sign-up user flow, before they register themselves in WordPress. Instead, with the help of the WPO365 plugin for WordPress, users are automatically registered in WordPress, the moment they complete the self-service sign-up in Azure AD B2C. And if they need to update their profile, they will do so in Azure AD B2C and those changes are automatically synchronized to WordPress.
Let’s assume that the users in my Azure AD B2C are all customers, who visit my WordPress website regularly and purchase items in my online shop. Those customers would need to add their VAT details, so that this information can be printed on their invoice.
Add a new custom user attribute in Azure AD B2C
To add a new custom user attribute in Azure AD B2C, you must go to Azure Portal, switch to the correct Azure AD B2C directory and click Azure AD B2C.

Now perform the following steps to add a new custom user attribute.
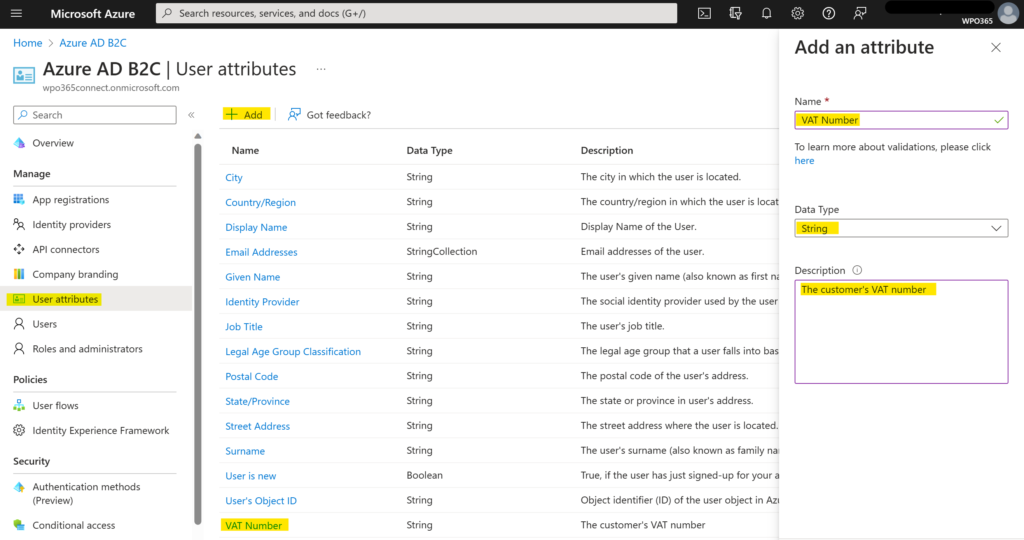
- Click User attributes under the Manage section.
- Click + Add to open the Add an attribute panel to the side.
- Enter a Name e.g. VAT Number, select a Data Type e.g. String and optionally add a Description.
- Click Create to add the custom user attribute.
Add the newly added custom user attribute to a User Flow
Adding a new custom user attribute does not automatically add it to any of the User Flows. Perform the following steps to add the newly added custom user attribute to a User Flow.
- Open the page with User flows.
- Select the User flow where you would like to use the newly added custom user attribute.
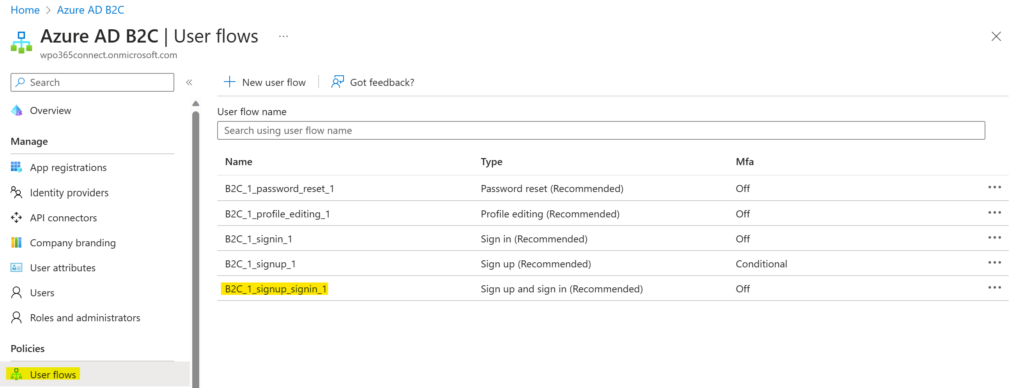
In this example I am adding the field first to the sign-up and sign-in User flow. This then enables me to add the new user attribute VAT Number to the sign-up form and also to add it to the application claims that I would like to receive in the ID token when the user successfully authenticates. This way, the WPO365 plugin can use the information to automatically create a new WordPress user (or update an existing WordPress user).
I must to repeat this step for the profile editing User flow, if I also want to allow users to edit the custom user attribute.
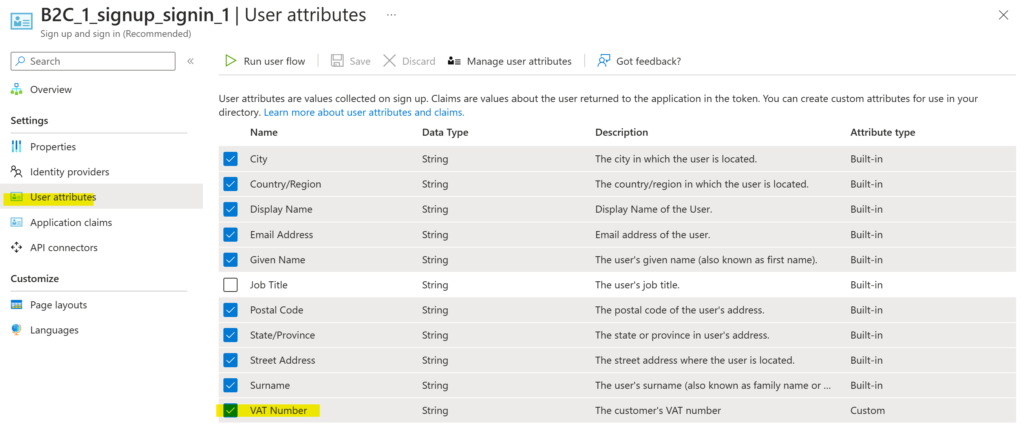
- For the specific User flow, click User attributes.
- Check the newly added custom user attribute to enable it for the current User flow.
Include the newly added custom user attribute in the ID token
- Continue to Application claims.
- Check the newly added custom user attribute to instruct Azure AD B2C to include it as a custom claim in the ID token. The ID token is sent to the WordPress website and processed by the WPO365 plugin each time a user successfully signs up or signs in.
Now you’re all set and done and the WordPress website will receive custom user attributes from Azure AD B2C. Please note that changes that you make to Azure AD B2C sometimes require some time before they become active (I needed to wait on some occasions for more than an hour).
Update (synchronize) a WordPress user profile with user attributes from Azure AD B2C
The next step is to configure the WPO365 plugin, so that it will read the claims received in the ID token and update the user’s profile in WordPress. Please refer to this article for steps on how to accomplish just that.
Please note that support for synchronizing user attributes from Azure AD B2C to WordPress requires the LOGIN+ extension. To synchronize data (including custom attributes) on a regular interval e.g. once per day, you must configure WPO365’s User synchronization feature. This feature is included in the SYNC bundle (which includes the LOGIN+ features and many more).